How to configure C++ environment of opencv in Visual Studio Code - macOS
List to do
- Install Visual Studio Code
- Configure C++ compile environment 🔗 tasks.json
- Configure C++ debug environment 🔗 launch.json
- Install opencv package
- Configre opencv environment 🔗 c_cpp_properties.json
- Set pkg-config
- Set pkg-config PATH
- Compiling source codes by refering opencv pakage
As a result of experiencing set up the environment, Xcode is easier than VSC…
How to configure the environment of opencv in Xcode
However, since VSC (Visual Studio Code) has advantages of ease of use and lightness, I’ve worked hard to organize the setting method. Also, using VSC seems to increase productivity by simply pasting a pre-set file into a project, without configuring cumbersome settings for each project.
1. Install Visual Studio Code
Select one of the following to install visual studio code.
① Installation using brew(Open a terminal, enter following command)
1

brew install --cask visual-studio-code
② Download VSC installation file and install it.
2. Configure C++ compile environment 🔗 tasks.json
3. Configure C++ debug environment 🔗 launch.json
You can find the contents of #2 and #3 in the article below.
will be migrated on this blog soon.
How to set the environment of C++ compiling and debugging in Visual Studio Code - macOS
4. Install opencv package
Installing and setting at once through the brew.
1

brew install opencv
installed on following directory if you enter the command above.
/usr/local/Cellar/opencv/
5. Configre opencv environment 🔗 c_cpp_properties.json
5.0 Pre-works
-
c_cpp_properties.jsonfile :- supports additional features of C/C++ Intelligence extensions
- lets you specify a standard version of the C++
- add a relative path to refering particular header files for opencv packages
- how to create the file : select “C/C++: Edit Configurations (UI)” from the pull-down menu with the following shortcuts
1

(command key) + (Shift key) + P
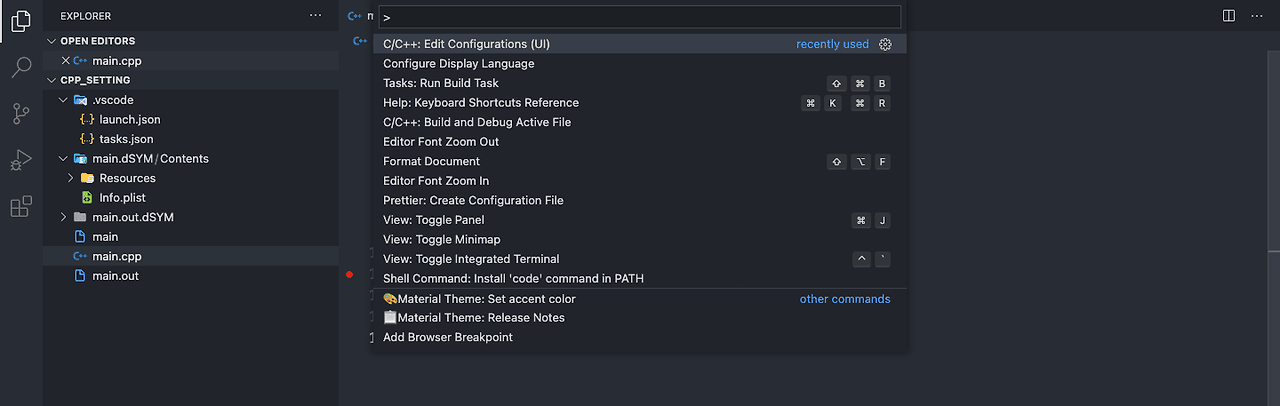 c/c++ configure menu on Visual studio code
If you select C/C++: Edit Configurations (UI), the following window will appear, where you can assign includePath, compiler Path, C++ standard version and etc. By adding the path of installed package on includePath, You can refering it in your project, such like “~/opencv4”.
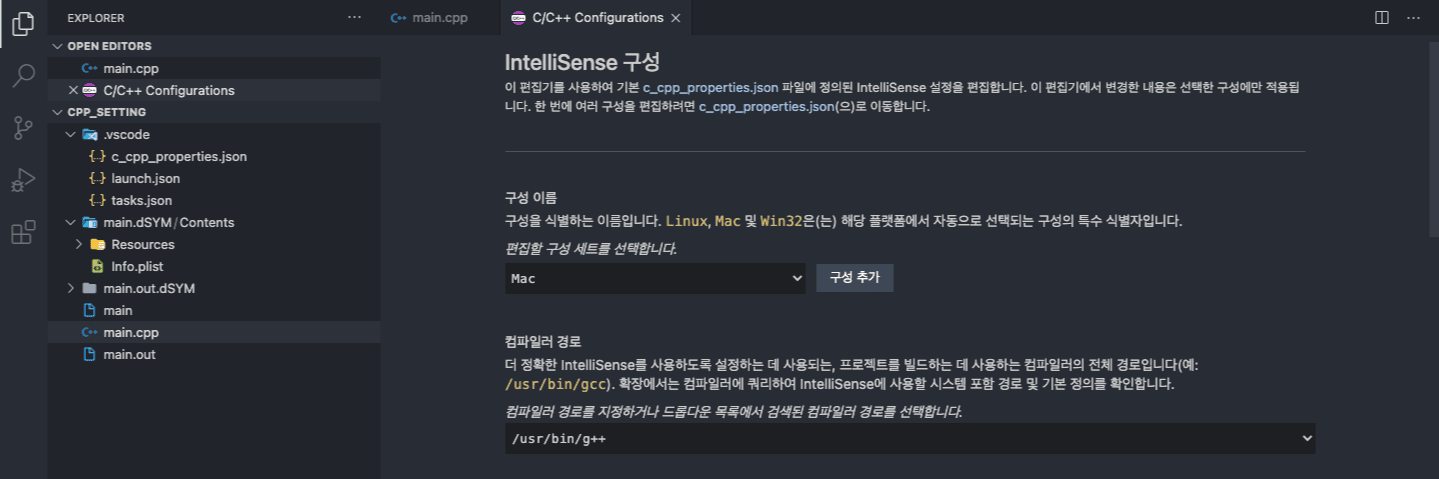 Specifying c/c++ environment, json-way
- 📓 c_cpp_properties.json (working fine with this combination..LOL😎)
1
2
3
4
5
6
7
8
9
10
11
12
13
14
15
16
17
18

{
    "configurations": [
        {
            "name": "Mac",
            "includePath": [
                "${workspaceFolder}/**",
                "/usr/local/Cellar/opencv/4.5.1_2/include/opencv4"
            ],
            "defines": [],
            "macFrameworkPath": [],
            "compilerPath": "/usr/bin/g++",
            "cStandard": "c11",
            "cppStandard": "c++11",
            "intelliSenseMode": "macos-clang-x64"
        }
    ],
    "version": 4
}
5.1 Set pkg-config ⚙️
This is a little cumbersome work, once you want to use opencv feature with C++, especially when you need to refering specific library of opencv, I recommend this way to configure it to use.
Alright, in order to refering them, I used pkg-config. It helps compiling process by refering considered libraries.
- how to install
pkg-configthrough brew
1

brew install pkg-config
- completed the installation
Then, you can use pkg-config, and please make sure if it is well installed in the path below. (the path could be differed depend on its version and intended user operation.)
1

/usr/local/Cellar/pkg-config/0.29.2_3/bin/pkg-config
- opencv4.pc file, for refering several librareis
If you install opencv with the brew command, a folder related to pkgconfig will be installed along with the opencv installation path, which will have a pc extension file in the form of opencv4.pc. (In my case, The installation version was 4.5.1, so the pc file name contains the number four.)
1

/usr/local/Cellar/opencv/4.5.1_2/lib/pkgconfig/opencv4.pc
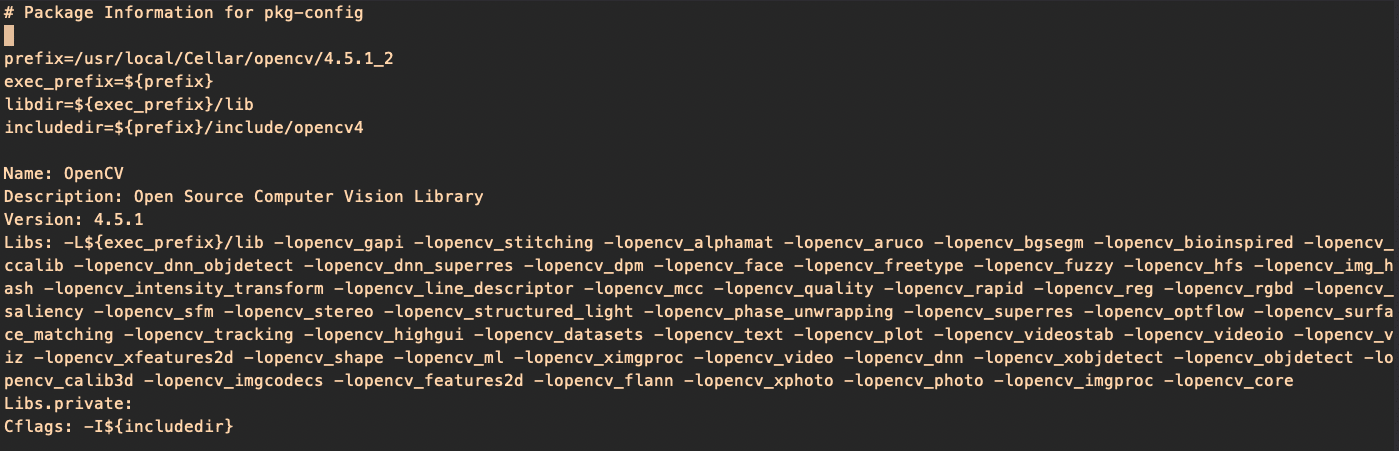 inside of opencv4.pc file
Now pkg-config can refer to IncludePath of opencv and (multiple) dynamic libraries as an argument by this pc file, but still pkg-config cannot be called globally, so let’s set PATH globally.
5.2 Set pkg-config PATH ⚙️
The idea is setting the path of the environment variable.(just like we usually do) The variable name for pkg-config is PKG_CONFIG_PATH, and make sure assigning it to the path where the opencv4.pc file located. I typed a line into the .zshrc file in the root directory (because the writer is using Oh-my-zsh.) for permanent assignment.
1

export PKG_CONFIG_PATH=/usr/local/Cellar/opencv/4.5.1_2/lib/pkgconfig
Let’s echo if it is well assigned.
1

echo $PKG_CONFIG_PATH
5.3 Compiling source codes by refering opencv pakage ⚙️
Once the setup is complete up, you should check if referring libraries work properly. Please enter the command below at the terminal. String of opencv4 in below command should be same with the pc extension file name.
1

pkg-config opencv4 --libs --cflags opencv4
Result of entering pkg-config command
 list of referring libraries by pkg-config
Testing
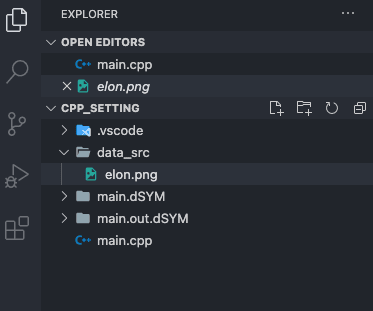
Then, I created a cpp file and tested if compiling with the opencv packages works fine. Please prepare any image file in the project folder for the test. In my case, I made a folder and put an image like this, data_src/elon.png.
 ready to compile process
  sample image : elon.png
main.cpp for testing. (RGB to Gray Scale image)
1
2
3
4
5
6
7
8
9
10
11
12
13
14
15
16
17
18
19
20
21
22
23
24
25
26
27
28
29
30

#include <iostream>
#include <stdlib.h>
#include <stdio.h>
#include <opencv2/imgcodecs.hpp>
#include <opencv2/imgproc.hpp>
#include <opencv2/highgui.hpp>

using namespace std;
using namespace cv;

Mat src, dst, src_gray;

int main()
{
    int rtn = 0;

    src = imread("data_src/elon.png");
    cout << "test" << endl;

    cvtColor(src, src_gray, COLOR_RGB2GRAY);
    imshow("imgGRAY", src_gray);

    rtn = waitKey(0);
    if (rtn == 27)
    {
        return 0;
    }

    return 0;
}
And, for compiling, type the following in the terminal
1

g++ -std=c++11 `pkg-config opencv4 --libs --cflags opencv4` main.cpp -o output
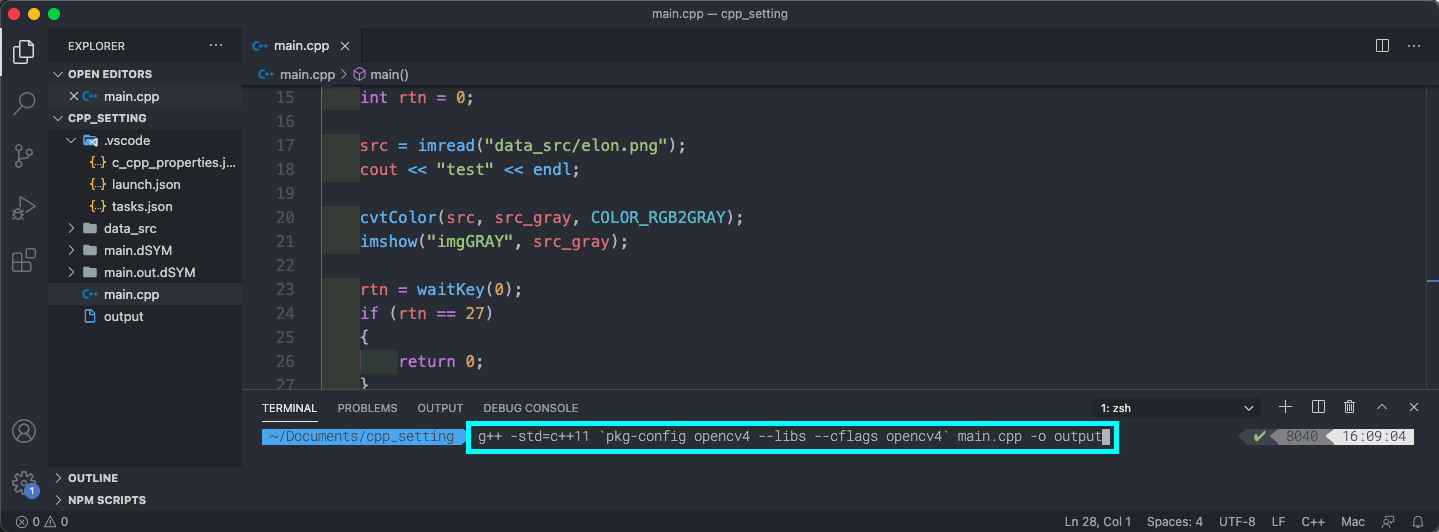 Compiled with std version of c++11
I named the executable file as output. If you run the file, you can see that the image has been changed to gray one. (Enter esc to exit the window)
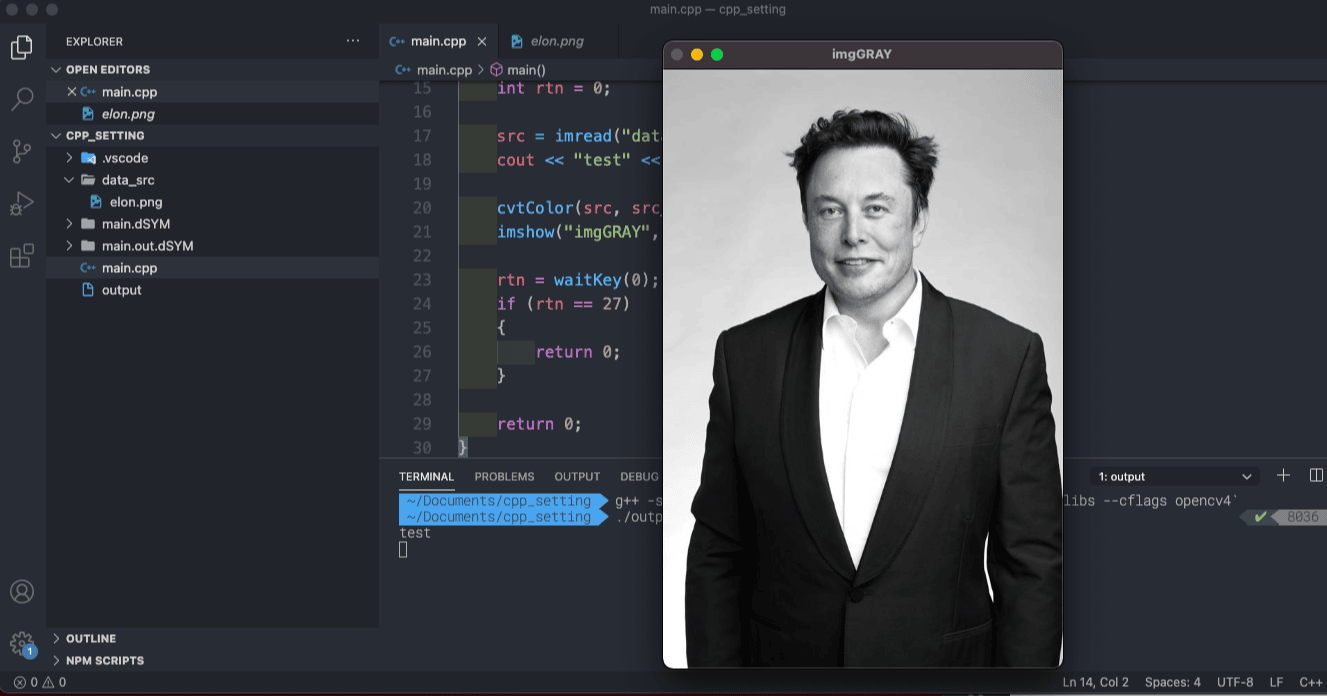 the result of executing output file
I have confirmed that OpenCV package works properly up to this point. However, if you have to write down a lot of options every time when you build your application, just like pkg-config, cflags, and blahblahblah.. there is no reason you have to use VSC.
Luckily, we have a tasks.json file to reduce our effort to run and compile the application. You can write it down by dividing the parameters by space. Then, you can modify or delete some of the details, and you don’t have to remember commands or type them on the keyboard every time. Just press command + shift + B(mac).
The tasks.json file that modified for my usage…
1
2
3
4
5
6
7
8
9
10
11
12
13
14
15
16
17
18
19
20
21
22
23
24
25
26
27
28
29
30
31
32
33
34
35
36

{
	"version": "2.0.0",
	"tasks": [
		{
			"type": "cppbuild",
			"label": "C/C++: g++ 활성 파일 빌드",
			"command": "/usr/bin/g++",
			"args": [
				// 기존의 기본 매개변수 구성.
				//"-g",
				// "${file}",
				// "-o",
				// "${fileDirname}/${fileBasenameNoExtension}",
				//

				"-std=c++11",
				"`pkg-config",
				"opencv4",
				"--libs",
				"--cflags",
				"opencv4`",
				"${file}",
				"-o",
				"${fileDirname}/${fileBasenameNoExtension}"
			],
			"options": {
				"cwd": "${workspaceFolder}"
			},
			"problemMatcher": [
				"$gcc"
			],
			"group": "build",
			"detail": "compiler: /usr/bin/g++"
		}
	]
}
final, Completed the build 🚀

If you’re macOS user, you can set up the opencv environement in a relatively easy way in Xcode. However, if you prefer to use VSC, you should try this. The overall processes of this article is based on here as a reference.